Web Statistics

Tuesday, December 29, 2015

How to Care for Chickens in the Winter

Winter is here and like preparing everything else for the winter months, it is also important to plan ahead when caring for animals in the winter. In this post, I will discuss a few simple checkpoints on how to care for your chickens in the winter.


We have had our own backyard chickens for about 3 years now. This fall we built our chickens a new chicken house for them to have more room. When it comes to our chickens, I love saying the expression "If you take care of them, they will take care of you," as we usually get several dozen eggs each week from our chickens. We definitely enjoy using fresh farm eggs for our meals, cooking, and baking. Chickens are pretty easy to care for, but you also might be interested in knowing some extra tips for how to care for them in the winter months. They are pretty hearty birds and can handle cooler temperatures if provided adequate necessities in those cooler winter months.


Provide a strong wind barrier. By providing a chicken coop or chicken house for the chickens will help the chickens stay warm and out of the wind. Each fall we check over the chicken house, winterize it, and make sure its not drafty for the chickens.

Fresh water. Chickens need a good amount of water to produce eggs. Since it is likely that the water will freeze in the winter time, you might invest in a heated water pan or also be sure to provide fresh water to the chickens a few times a day. Chickens can often make a mess out of their water pan, so I would suggest not leaving it in the area of the chicken house where it would wet the bedding. Maybe keep water pan outside or in an area with less traffic. Keep extra waterers on hand incase you need to switch out ones that have frozen over.

Provide protein rich feed. Added nutrients will be valuable for the chickens during the cooler winter months. This will give them extra energy and help them stay warm as well.

Good ventilation. During the cooler temperatures, chickens like to crowd together to stay warm. Moisture should not be able to accumulate and freeze. Good ventilation will help keep the chicken house dry and also prevent sickness in the chickens.


Provide good bedding.  Use straw or shavings to keep the chicken coop floor dry and comfortable for the chickens to live in. Changing the bedding frequently will also help keep the chicken coop dry maintaining a healthy chicken coop.


Use a heat lamp. Adding a supplemental heat source will help prolong egg laying. Once the chickens are all nestled together they provide their own heat source with their bodies that is adequate for the cooler temperatures. A heat lamp isn't necessary, but they are often used. Use with caution.

Check chicken nests often.  If your chickens are laying well, you will still want to check their nests often to be sure you gather eggs often. This will prevent the egg from freezing.


A few simple steps during the winter months will help your chickens remain healthy and stay happy chickens.


Saturday, December 19, 2015

Homemade Caramels

Making holiday treats is one of my favorite traditions of the Christmas season! This recipe of my grandma's soft, chewy, and creamy caramels is definitely a well liked treat among my family.


I have so many memories growing up of family getting together to make a variety of holiday treats for the Christmas season. All of us cousins, sitting around grandma's table wrapping the individual caramels and talking about Christmas was something I looked forward to each year. Today, Grandma continues to make caramels with help from several family members that would also like some. If you read my last recipe post, I mentioned what we did growing up to say Merry Christmas to our neighbors and service workers. I have continued this on a smaller scale with my kids and include these homemade caramels in my goodie packages. My oldest son especially loves these caramels too!

They are great to give several by themselves, or use them in other Christmas treats you might want to make, like turtle candies or inside cookies. Add them to a mixed candy/cookie tray and take to work, give to your everyday service people, neighbors and friends. Package up several in a small mason jar and they are great teacher gifts as well.

So let's get to the recipe of these creamy homemade caramels!


Ingredients:
1- 16 oz bottle of Karo syrup
4 cups sugar
3 pints whipping cream
1/2 cup chipped paraffin


Chipped Paraffin
Supplies:
-Heavy cast iron pan or pressure cooker pan
-Candy thermometer
-Wax paper cut to wrap bite size pieces. roughly 4"x 4"
-Large cookie sheet 11 1/2" x 17" x 1/2 deep roughly
-Lard to grease cookie sheet
-Long handled spoon
-Paring knife

Directions:
-Mix syrup, sugar and 1 pint whipping cream together in pressure cooker pan. Cook on medium heat to "soft ball" on thermometer. Stir occasionally.
-Add 1 pint cream and stir in while pouring. Cook to "soft ball'. Stir more often.
-Add the last pint of cream and stir while pouring. Cook to 242 degrees F. Turn off heat. and stir in paraffin chips until completely melted. Stir more often so it doesn't burn.
-Pour into a large cookie sheet greased heavily with lard.
-Cool, cut into bite size pieces, and wrap with wax paper.

*A few notes*
-When caramel is cooled, wipe top layer of wax off with paper towel. This helps get excess wax off the caramels.
-Making the caramels takes a good hour to hour and half for cooking start to finish. Plus about an hour to cool.
-The caramels get darker with each cream added
-One batch makes approximately 5 lbs of caramels.


Enjoy!!


Friday, November 27, 2015

What does "free range" eggs mean?

Among many of the labels we see on products these days, the term "free range" is one of them you are probably familiar with seeing. Free range chicken, free range eggs, free range beef, etc. but what does free range mean?

Growing up, I remember my grandma giving me the chore to go collect the eggs for the day and feed the chickens. I'd take the pail out and gather all the eggs for the day, bring them in and wash them off. There was a lot of egg gathering memories from my childhood. My husband has the same memories as his grandpa raised chickens as well. We find ourselves doing the same thing with our kids, having them go out and collect the eggs for the day.


Along with growing produce for our CSAs and local farmers market, we also raise chickens for meat and eggs. Our Rhode Island Red hens enjoy a nice size chicken run where they can go outside from the chicken house. Speaking of chicken house, we just built a new, larger one this fall. It gives our hens more room inside for when they come in at night. We then also have a large size chicken run pen for them. We have a 3 area rotation outside the barn that the chickens still can enter the pen from the barn and vise versa. We rotate the pens every so many weeks for the chickens to enjoy new pasture. This is how our chickens are free range and we have free range eggs.


To many consumers the labels, free range, organic, local, cage free, etc can be confusing. In this post, I'm going to address free range. What does free range mean to a farmer.

A free range chicken is allowed constant 
access to the outside, with plenty of fresh 
air and room for exercise. 
The chickens are not contained in cages. 

The USDA says free range chickens are allowed access to the outside.


We feed our chickens a combination feed, but not so much that they don't forage graze.  They have constant access to the outside with plenty of room for exercise. They also have a nice size chicken house to protect from temperatures, wind, and to roost in at night. Our pastures pens get rotated for fresh pasture for them to graze and roam on. Our meat birds and our egg layers are raised the same. Inside our chicken house, we have our nesting boxes available for the hens. They have access to the nests from the inside of the pin, and we gather the eggs from the outside.


This allows us to have free range chicken and free range eggs to sell to our consumers.


Sunday, November 15, 2015

Banana Bread

If you are looking for a delicious and moist banana bread recipe, this one sure won't disappoint!


I'd say I probably bake banana bread once a month. I like to make loaves and put them in the freezer. This recipe is my mom's blue ribbon recipe when she entered it into the 4-H fair for her foods project. She has been making it ever since, shared the recipe with me and it is my favorite bread recipe to make. I remember during the holiday season especially, my mom gave out a lot of baked items to the neighbors, and service people for our family. Saying have a Merry Christmas to the bus driver and handing her a loaf of banana bread all wrapped up, and taking baked goods to the neighbors doorsteps is something I remember so well from my childhood days.  I have also been doing this with my kids and banana bread is a favorite I like to give.


The kids love banana bread too! We enjoy for breakfast, after a meal, or just for a snack! Banana bread is also a great way to use up those bananas that haven't been eaten. Sometimes if we have one or two loan bananas on the counter, I'll mash them and place in the freezer until I have enough bananas to make several batches of banana bread at a time.


I think I'll go make some right now!


Banana Bread

Ingredients:
1/2 cup Crisco
1 1/2 cup sugar
2 eggs
1 cup milk
3 mashed bananas
3 cup flour
1/4 tsp salt
1 tsp baking soda
2 tsp baking powder

Directions:
Mix Crisco and sugar together in large mixing bowl. Add the eggs, milk and mashed bananas and mix. Then add the flour, salt, baking soda, and baking powder and mix together well. Pour mixture into loaf pans and bake at 350 degrees for 45 minutes. Yields 2 large loaves.
Let cool before taking out of pan.

Variations:
 Add 1 cup of nuts for Banana Nut Bread
Add 1 cup of Chocolate Chips for Banana Chocolate Chip Bread
Pour mixture into mini loaf pans for several mini loaves.
Freezes well.


Saturday, October 31, 2015

What to do with leftover pumpkins?

Did you decorate your home with pumpkins this Fall? Did you carve designs in pumpkins with the kids? What do you do with your pumpkins after the season is over? Here are some ideas of different things you can do with the pumpkins you have carved or simply placed around for decoration.


I like to decorate around my house with groupings of pumpkins and squash to add a touch of Fall to different areas of my yard. The kids also like to carve some designs into their pumpkins and place on the front steps. You've seen all the fun designs from characters, to scenery images, to different faces, and everything in between. We simply let them draw a face on their pumpkin and use the carving knife and carve their designs. Some really fun faces are the end result and they are so proud!

After Halloween, our carved pumpkins are looking pretty sad. I am one that thinks of Thanksgiving as a Fall holiday, so I'm not one to put out Christmas decor until after, but our carved pumpkins simply don't last that long.


Here are some ideas to do with your CARVED PUMPKINS:

-Feed the wildlife. A pumpkin that you would otherwise throw away, could be a treat for animals in nature. Depending where you live, left over pumpkins (carved or not, and left over seeds) can be a perfect snack for deer and birds. If you have chickens, you can also toss the pumpkins to them. Simply cut the pumpkin shell into several pieces and toss them out away from your house for deer or birds to nibble on. You might also place unwanted pumpkin seeds in a bird feeder and hang from a tree for the birds to enjoy. Be sure to not feed any moldy pumpkins.
                -You could also make the pumpkin shell be the bird feeder itself by cutting it in half and                      filling with bird seed.

-Add to your compost pile. Cut the pumpkin up into several pieces and place in your compost pile to breakdown. Don't have a compost pile? Simply cut the pumpkin in small pieces and scatter it in your garden. It will breakdown and add nutrients to the soil.

If you don't have any carved pumpkins at your home, you might be looking for ideas to do something your uncarved pumpkins. There are a variety of food options you can do. Do not use your carved pumpkin for food choices. After a pumpkin is carved and sitting out, it is unsafe to eat.


The following are ideas for UNCARVED PUMPKINS:

-Make a pumpkin planter. Great use for a carved or uncarved pumpkin. Stop by the garden shop and pick up some flowers. Maybe some pansies, a mum, or ornamental kale (cool crop flowers here in Indiana).You can cut the top off your pumpkin and plant flowers in the top to make a planter. Later you can plant the whole pumpkin in the ground. The pumpkin will break down, and your flowers will continue to grow in fertilized soil.

-Make pumpkin puree. Pumpkin puree is super easy to do and a great way to use the fleshy insides of the pumpkin. Scoop out all the seeds and guts and set them aside for another use. Cut your pumpkin in half and place it upside down in a baking dish with about a cup of water. Bake the pumpkin for about an hour or until the fleshy insides are tender. Scoop out the tender flesh and puree it in a food processor. You will now have pumpkin puree for all your favorite pumpkin recipes. You can also store it in the freezer for several months.

-Roasted pumpkin seeds. What a great way to use the seeds of the pumpkin by roasting them. There are so many recipes and you can season them to your liking.

-Dry the pumpkin seeds and save for next year. You might want to try growing your own pumpkins next season. Clean the pumpkin seeds off and let them dry. Place them in a storage container or bag and plan them next year in your garden and grow your own pumpkins.

-Have some fun with your pumpkins! If you don't particularly want to do anything else with your pumpkins, why not have some fun with it! Have you heard of pumpkin chuckin' with a catapult? Make your own catapult or sling shot, and see how far your pumpkin will fly through the air. Or simply see how far you can throw the pumpkin.

What will you decide to do with your left over pumpkins? Hope you can enjoy one or a few of these options instead of just letting them rot away.


-

Friday, October 9, 2015

Homemade Applesauce

Have you ever made your own applesauce? Here is a super easy recipe to make your own homemade applesauce for the freezer. You will love it!


My mom has taught me a lot of my freezing and canning recipes and this one is a must to make sure I get stocked up in the freezer each year. The fall season is when apples are harvested here in the Midwest, so I always buy the apples in bulk from a local apple orchard and make my favorite apple recipes, including putting up several of them in the freezer. 

My whole family loves homemade applesauce so it is also a bonus there. We like it slightly on the chunky side with just a hint of cinnamon. Any sauce apples will do, but I prefer a slightly tart apple like Cortland or McIntosh. 


Some Good Applesauce apples:
Corland
Gala
Golden Delicious
Honey Crisp
McIntosh
Rome

Here is the delicious recipe, You will love this applesauce time and time again, It is truly an easy recipe for something that can be a snack, part of a meal, and made from scratch, and doesn't take much time at all. 


Homemade Applesauce
(I don't measure with this recipe as it is all in taste.)

-Peel, core, slice, and cube your apples. Place them in your pan on the stove. Sprinkle fruit fresh or lemon juice on your apples to help prevent them from browning. 
-I use a large oval roasting pan and fill that with my apples. I place it on my stove over 2 burners. 
-Add about 2 cups of water at the bottom of your pan so the apples don't burn. 
-Cook apples until soft. 
-Add sugar and cinnamon  (start with small amounts at a time...this is all by taste and what you prefer!)
-I use a handheld blender and blend the apple chunks to mostly smooth. I like my applesauce slightly lumpy so I don't blend it all the way smooth. 
-Taste test your applesauce. If you prefer it a little sweeter or with more cinnamon, add more to the mixture and blend again. (Applesauce tip - if you want to use less sugar, make your applesauce with a sweeter apple or combine a sweet apple with a tart apple). 
-Spoon your completed applesauce into plastic freezer containers or into jars leaving a inch or so at the top for freezing. Let the applesauce cool completely then place in the freezer. 


You'll love having homemade applesauce in your freezer! Enjoy!


Wednesday, September 30, 2015

What are fall garden clean up tips?

As we enter into the last few weeks of fall, knowing that the first frost is on its way, it is a great time to take this opportunity for cleaning up the garden. By doing a few simple tasks for fall garden clean up, you will gain a head start in the when planting time comes in the spring.

The weather has been perfect to take advantage of the time to give some extra attention to your vegetable and flower gardens before winter. This time of year, you're done harvesting all the bounty (or getting close) your vegetable garden has produced and your flower garden starts to wither away and plants die down. It may be hard to keep motivated to get back in your garden and do that garden clean up, but by working ahead of the cooler temperatures coming will be beneficial to your garden.

Mulch bed prepared for winter months.


Below are some tips for fall end of season garden clean up:

MULCH - Protect plant roots and soil from extreme temperatures during the winter months. Here in Indiana we can see some pretty cold temperatures! Cover perennials, shrubs, and newly planted trees with 2 to 3 inches deep and about 2 times the width of roots at the base with a good layer of mulch.

PRUNING - Shape plants and remove any dead or broken branches by cutting back, or pruning. Remove any top growth of perennials. This may also be done in the spring time, which is what I do as some plants I like to keep as is for "winter interest" with snowfall (example: hydrangeas and ornamental grasses). Be sure the growing point of the plants is still protected for the winter months.

WEEDING - Always maintaining weeds is beneficial for your garden. Weeds can drop seeds that can overwinter, which will sprout in the spring. Continue to weed your garden until the ground freezes.

WATERING - It is always important to water newly planted trees, shrubs, and perennials. Early fall is a good time to plant new plants, but be sure to continue to water even though the temperatures are cooler as they have not completely developed a self sustaining root system yet.

REMOVE PLANTS - Annuals that aren't cold tolerant, like pansies, will die off after a hard frost. Remove annuals from your garden and flower beds.

COMPOST- Doing fall clean up is a great time to continue to add to your compost pile. Discard any diseased plants, but take advantage of the opportunity to discard any good plants in your compost pile.

CONTAINERS & GARDEN ORNAMENTS - Be sure to clean up and put away your garden ornaments to prevent them from cracking in the winter. This is a great time to clean up flower pots, containers, and vegetable cages and trellis' and store them away.

BULBS & GARLIC - Plant flower bulbs and garlic to overwinter in your garden and be ready to bloom next spring and summer.

BIRDS - Don't forget to continue to fill bird feeders for the winter. As the temperatures become cooler and snow falls, food becomes more scarce for birds and they will love finding your bird feeder full!

PLAN - Now that this season is over, be sure to plan your garden for next season. Decide if you want to add any more flowers, shrubs or trees to your landscape. Plan an idea out for your vegetable gardens and what you would like to grow. By starting to plan in the fall, you will have an idea what you want to look for as the new season nears. You can get a head start on possibly ordering vegetable seed as well.

I like to leave my dried hydrangea blooms for "winter interest" with the snow.
By taking the time to get you garden ready for fall and winter and the cooler/freezing temperatures you will be giving yourself an advantage to the season to come in the spring. You won't regret spending the extra time to do these steps. 


Thursday, September 17, 2015

Fried Cinnamon Apples

There are so many things I love about fall time, it is hard to choose an absolute favorite. These Fried Cinnamon Apples sure are up there on the list though. I love the buttery cinnamon flavor combined with apple. They are so delicious!

My family loves apples! We eat them year round, but in the fall when they are more available from apple farms, is when we really make a lot of different things with apples. My husband is usually the one that makes our fried cinnamon apples as he really really likes them. Often times we have them as an after dinner treat. This recipe is super easy and a nice addition to any meal.


Ingredients: 

2 Apples
1/2 Stick Butter
2 Tbsp White Sugar
2 Tbsp Brown Sugar
Cinnamon (to taste) 

Directions: 

1. Peel apples and slice. 
2. Cut slabs of butter and place in pan and melt. 
3. Add apples to pan. Cook until soft. 
4. Add sugar and brown sugar to pan. 
5. Add cinnamon for your taste liking. 
Don't over cook, the apples can get too mushy or caramelized too much. We like them just soft. 

We generally just make this basic recipe, but it can easily be multiplied to serve more! What a great way to bring fall into your cooking by serving these cinnamon apples. 


If you want to change up the way you enjoy apples, give this recipe a try! The apples are fantastic and have incredible flavor! Enjoy the flavors of fall!


Thursday, September 3, 2015

How to tell when pumpkins are ready to pick?


With our Summer days nearly close to over, its time to start thinking about the months ahead. The Fall season brings some of the most beautiful colors in nature. Colors in the changing of the leaves, mums, Indian corn, gourds, and PUMPKINS.


Around the beginning of September, the feeling of Fall is in the air and people are ready to start decorating their homes for the season. Pumpkins our our biggest crop we grow and one of our favorite. We love the Fall season and providing all the beautiful items for our customers to decorate with. We sell in bulk to local businesses and to customers at the farmers market and our Fall Harvest Days event.

Some grow pumpkins in their own garden. So when are pumpkins ready to pick?

Color - A good indicator is they have turned orange by this time of year. But also some pumpkins are ripe and ready to pick when they are still green, so be sure to check the other areas to see if they are ripe.

Tap the pumpkin - By taping the pumpkin or giving it a thump if it sounds hollow inside, the pumpkin is ready to pick.

Skin - When the pumpkin is ripe, the skin or outer core becomes hard.

Stem - You want the stem closest to the pumpkin becomes hard, the pumpkin is ready to pick.

Vine Leaves - The pumpkin vine leaves will start to dry and become crispy. The vine will die down when the pumpkins are ready to pick.

A few picking tips to remember:

Use a sharp knife or pruners when cutting the stem of the pumpkin.

Leave a long stem when cutting the pumpkin, this will slow down the rotting process.

Disinfect the pumpkin with diluted bleach to kill any bacteria on the outer core of the pumpkin that could cause it to start rotting early.

Picking pumpkins at cooler temperatures and displaying in shaded areas can also help slow down the rotting process by keeping out of direct sun and heat.

Pumpkins are beautiful decor pieces, a fun tradition to carve for Halloween, and great for all those favorite pumpkin food items everyone loves this time of year.

Enjoy your pumpkins and Fall!

Saturday, August 22, 2015

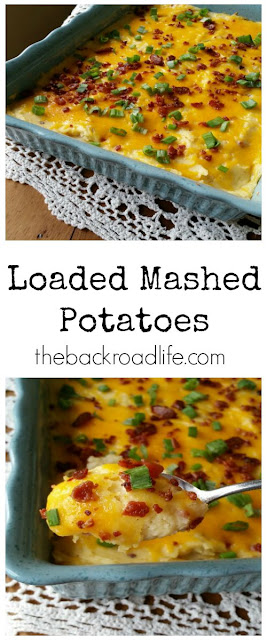
Loaded Mashed Potatoes

Are you looking for a Loaded Mashed Potatoes recipe?! Then I have the recipe for you! My family loves these potatoes.


Potatoes are one our favorite vegetables to grow in the garden. The grew very well this year and produced several bushels of potatoes. We are in the process of getting all the potatoes dug, cleaned, and graded by size, then sell them in bulk for our customers for the fall and winter months. The kids enjoy helping us dig them too. I especially love that they are seeing the whole process of farm to fork with helping us plant, dig, and prepare them for cooking.


We love potatoes!
Potatoes are a staple in our home. We eat them often various ways. This recipe is one of our favorites to have and everyone likes it! Usually we get leftovers from it too, which is also a added plus. 


Ingredients:
- 5 lbs potatoes
- 1 stick of butter
1 cup sour cream
3 cups shredded cheddar cheese
- 1/4 cup milk
- 1 lb bacon 
- green onions, green tops cut into pieces
- pepper

Directions: 
- Peel and cut up the potatoes and place in pot of water, boil until fork tender. 
- Cook bacon and crumble into pieces. 
- Preheat oven to 350 degrees
- Once potatoes are ready, drain and transfer to a large mixing bowl. Cut butter into several pieces and add those, the sour cream, and milk to the potatoes. Mash all together with a potato masher. 
- Add pepper, half of the bacon, and 2 cups of shredded cheddar cheese to the potato mixture. Mash everything together with the potato masher. I don't mind if my potatoes are slightly chunky, but mostly mashed. 
-Transfer potato mixture to a 9 x 13 baking dish. 
- Sprinkle the remaining cup of shredded cheddar cheese onto the top of the potatoes. 
-Bake in the oven until top cheese is melted and potatoes bake through - about 20 minutes. 
- Remove from oven and sprinkle the remaining bacon and the green onion pieces on top of the mashed potatoes. 
-Serve.  

This loaded mashed potato side dish would make a delicious addition to any of your meals. It is also great for those family get togethers and potluck dinners. A great way to enjoy potatoes from your own garden as well. 


Super Easy Loaded Mashed Potatoes. Homestyle Casserole dish to add to your meals.

https://www.pinterest.com/pin/208643395214094363/


Enjoy!